Overview
The demo workbook demonstrates calling two webservices. The first is a rudimentary CRUD service that shows how to use testing to evaluate result contents and, importantly, how to maintain state between tests. The second is a service that shows how to test binary content and view the results.
Note: These webservices are hosted on AWS and paid for out of my pocket. They are built to be "just enough" to demonstrate some of Apicize's capabilities. As long as the spend doesn't get too crazy, I'll leave them running. If they get abused or end up costing too much, I'll end up having to turn them off. The services use an OAuth-like client token that is short lived. Apicize keeps track of when OAuth2 client tokens expire and will automatically request a new token.
CRUD Testing
A common requirement of testing webservices is how to use data returned for one request in the next request. Apicize uses Groups to organized chains of requests together to facilitate this need.
Executing Tests
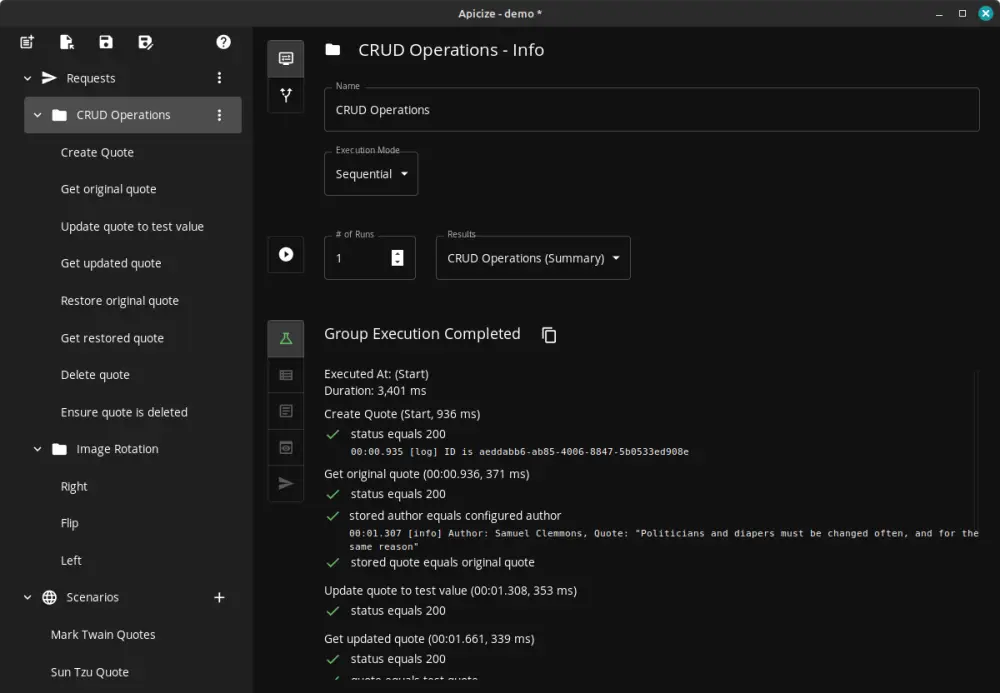
Our first group of requests creates, retrieves, updates and deletes a quote. These quotes are tied to the requesting token, and both expire after a few minutes. If you click on "CRUD Operations" you can then click on the run button (the one that looks like a "play" button). If all goes well, you should see a list of test results. like those displayed to the right.
Each request in the group is executed in sequence. This is important because, as we'll see, the ID is retained when the quote is created and used in subsequent calls. Alternatively, you can run launch the tests concurrently (by setting Execution Mode to "Concurrent"). If you do so, you'll see many of the tests fail. This is because most of tests rely upon the ID returned upon quote creation. Concurrent execution, along with being able to specify number of runs, are useful if you want to load test or otherwise test parllel execution.
Upon execution, you'll see a summary of each request, any tests executed for that request, and any console log statements captured during the test runs.
Use the Results dropdown to select individual requests results for the group.
You can set the "# of Runs" value to trigger multiple eecutions. The requests will be executed in sequence or concurrently, depending on how Execution Mode is set.
Viewing Results
To view how a specific request executed when running a group, select the request from the Results drop-down. If you execute multiple runs, you'll also see a drop-down that lets you select which run to view. Results are retained if you switch between different items in the Navigation pane.
Along the left in the lower response pane, you'll see a vertical tab bar. These let you view:
- Summary of execution
- Response headers
- Response body (either as text or Base64 if binary payload detected)
- Formatted response body (if Content-Type is recognized and handled)
- Request sent (headers, body, etc.)
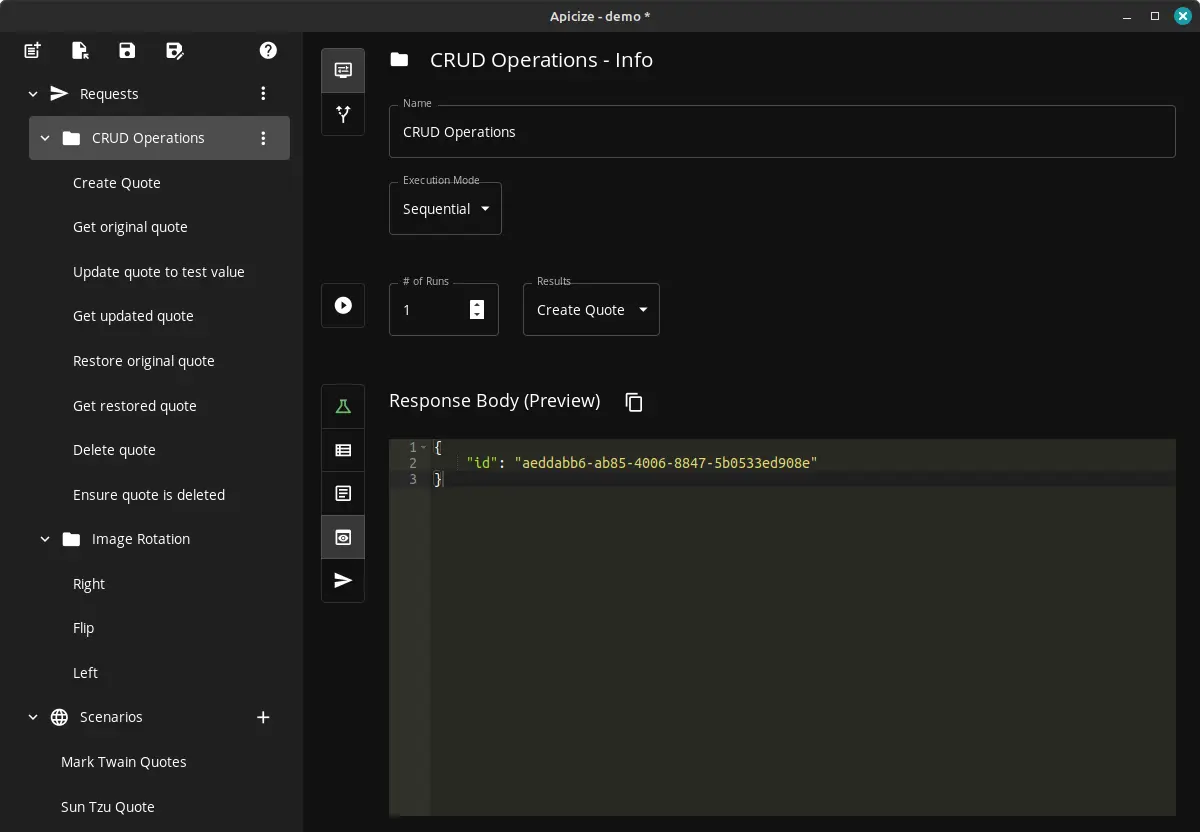
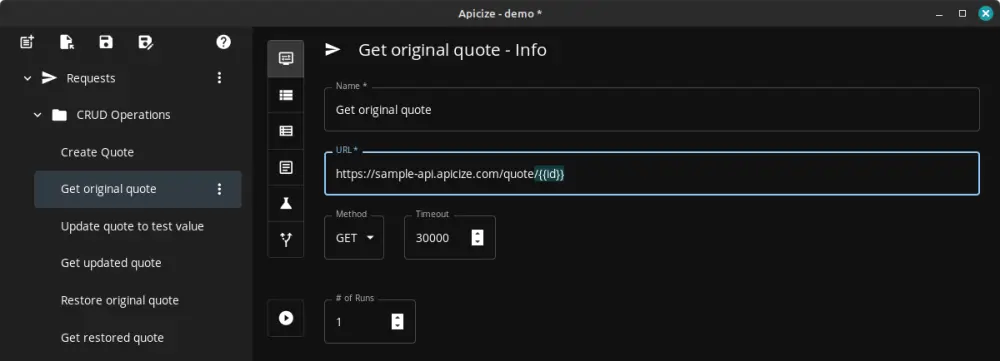
To the right, we see the response returned when creating a quote. That ID can be used for subsequent calls by leveraging Apicize's test capabilities.
Creating Tests
By default, Apicize creates a test for every request that checks to see if the response included an HTTP status of 200 (Ok). Apicize uses a BDD-style of formatting, powered by the [Chai](https://www.chaijs.com/) assertion library. This structure is used to organize and format the display of test results. Tests fail when an Error is thrown.
While checking for a 200 is useful, you can do more. You can inspect the response headers and body and throw an Error if something looks wrong.
Apicize tests run in an isolated V8 JavaScript environment. It's important to note that your
tests
are not running in a browser or even in NodeJS. There is no window,
document or NodeJS libraries like
What is available are the response, request and variables objects. The response object includes:
- status: HTTP status code
- statusText: HTTP status text
- headers: Name/value pairs of headers
- body: Posted body (data = base64 of body data, text = plain text)
- authoTokeNCached: True if a cached OAuth token was sent with the request
The request object includes:
- name: Name of the request
- method: HTTP method (GET, POST, etc.)
- headers: Name/value pairs of headers
- body: Information about posted body
- id: Apicize unique identifier for storing the request
Scenarios and Variables
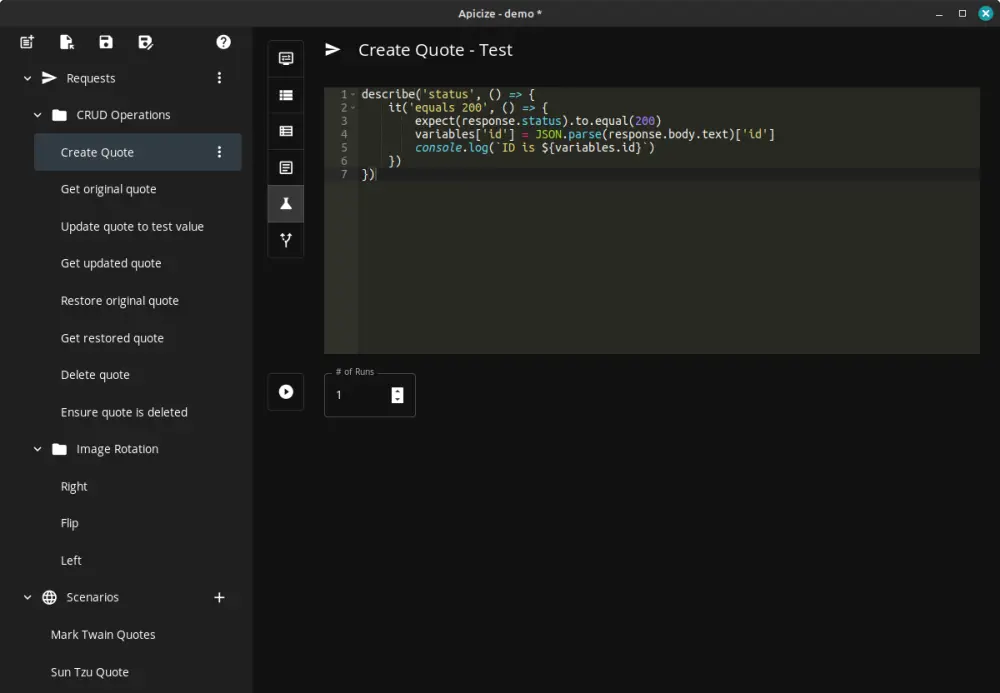
If you look at the test above, you'll see a line that sets a value in "variables":
variables['id'] = JSON.parse(response.body.text)['id']
What is happening here is that variables is a key/value store that is populated by the specified scenario (if any) when the request is run. With grouped requests, variables is passed from one request to another. This allows you to maintain a state between requests calls in a group, provided you run those requests in Sequence. In this example, we are parsing the body, retrieving the id value, and assigning that as a variable.
That variable can then be used in subsequent requests by specifying its name in handlebar syntax (i.e. "{{id}}") in the URL, header, query string parameter or body. One of the ways you can use this capability is to create "smoke tests" where the source system and its data are restored to their state before the tests are run (ex. creating an order, validating it, and then deleting it). You can store anything in a variable provided it is JSON serializable (i.e. you can't store functions in a variable).
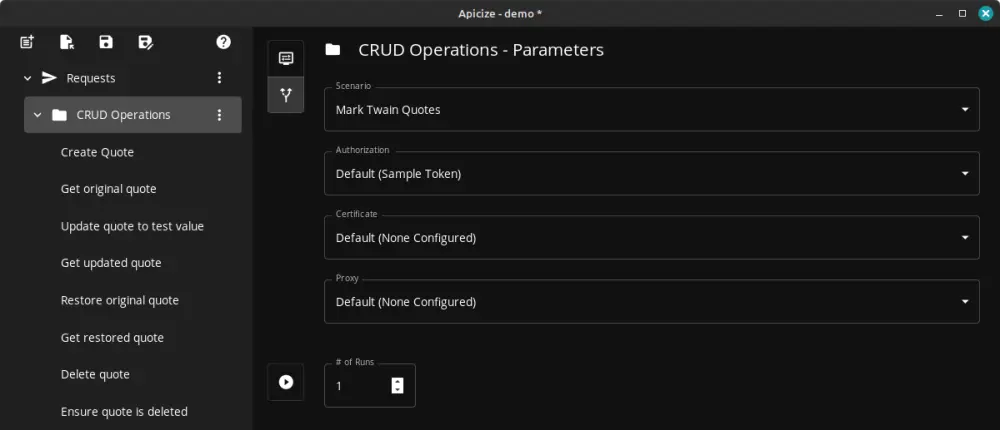
Scenarios are also useful when you want to test different sets of values using the same request or group of requests. Instead of having to clone those requests, you can create scenarios that can include a list of values to populate in variables. You can switch between them by selecting the Parameters tab in the top request pane, and then changing the scenario.
By default, requests in a group will inherit the parameters set for the group, but then can be overriden, or even disabled, by selecting the request and setting its parameters directly. Along with setting scenarios, you can also specify authorization method, client certificate and/or proxy.
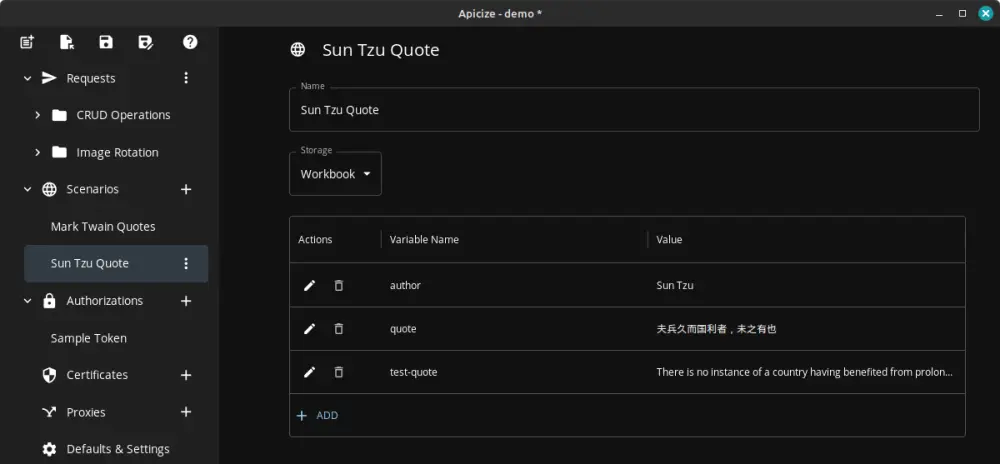
Going back to our demonstration, our group of requests creates, retrieves and updates a quote. It validates the quote was updated and then deletes it. We have created a scenario for a couple of quotes for Mark Twain, and that appears to work fine. You can update the values in the scenario or create a new scenario if you want. In our demonstration, we have created a second scenario for Sun Tzu, to ensure that unicode character quotes can be saved and retrieved properly (spoiler alert: they can).
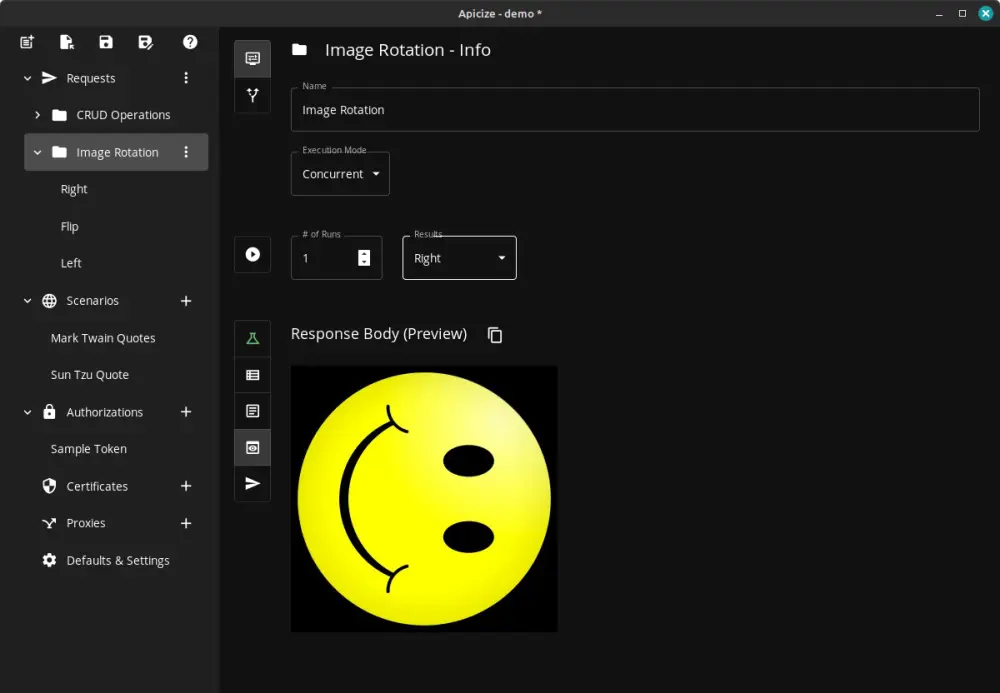
Testing with Binary / Image Data
You can pass binary data for Apicize tests by selecting the Body tab in the top request panel, and either opening a file (any type) or paste from the clipboard (images only). At this time, you can just see how much data is in the request, but not the data itself.
In the response pane, you select the "raw" data of, if available, you can "preview" a formatted or rendered version of that data for handled content types.