Overview
The demo workbook demonstrates using Apicize to call a few webservices. The first set of tests call rudimentary CRUD services that demonstrate how to use testing to evaluate result contents and, importantly, how to pass values between tests. The second is a service that shows how to test binary content and view the results. The third is a simple math calculator used to demonostrate non-JSON calls.
Note: These webservices are hosted on AWS and paid for out of my pocket. They are built to be "just enough" to demonstrate some of Apicize's capabilities. As long as the spend doesn't get too crazy, I'll leave them running. If they get abused or end up costing too much, I'll end up having to turn them off. The services use an OAuth-like client token that is short lived. Apicize keeps track of when OAuth2 client tokens expire and will automatically request a new token.
CRUD Testing
A common requirement of testing webservices is how to use data returned for one request in the next request. Apicize uses Groups to organize chains of requests together to facilitate this need.
Executing Tests
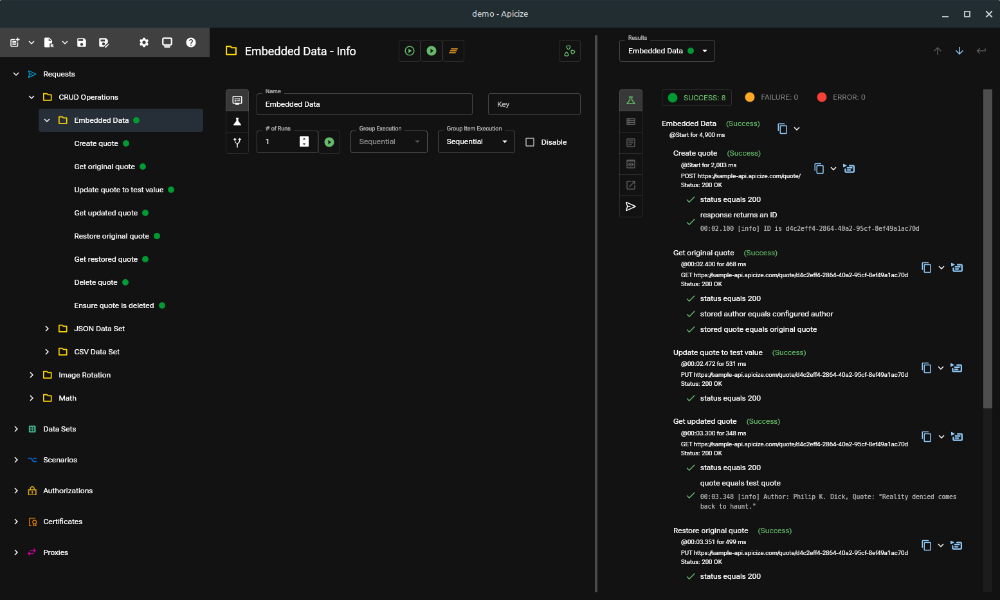
If you click on "CRUD Operations" and then "Embedded Data", you can then click on the Run button (the one that looks like a "play" button). If all goes well, you will see a list of test results like those displayed to the right.
Each request in the group is executed in sequence. This is important because, as you'll see, the ID is retained when the quote is created and used in subsequent calls. Alternatively, you can launch the tests concurrently (by setting Group Item Execution to "Concurrent"). If you do so, and re-run the tests, you'll see most of the tests fail. This is because most tests rely upon the ID returned upon quote creation. Concurrent execution, along with being able to specify number of runs, are useful if you want to load test or otherwise test parallel execution.
Upon execution, you'll see a summary of each request, any tests executed for that request, and any console log statements captured during the test runs.
Use the Results dropdown to select individual results for individual requests in the group.
You can set the "# of Runs" value to trigger multiple executions. The requests will be executed in sequence or concurrently, depending on how Execution Mode is set.
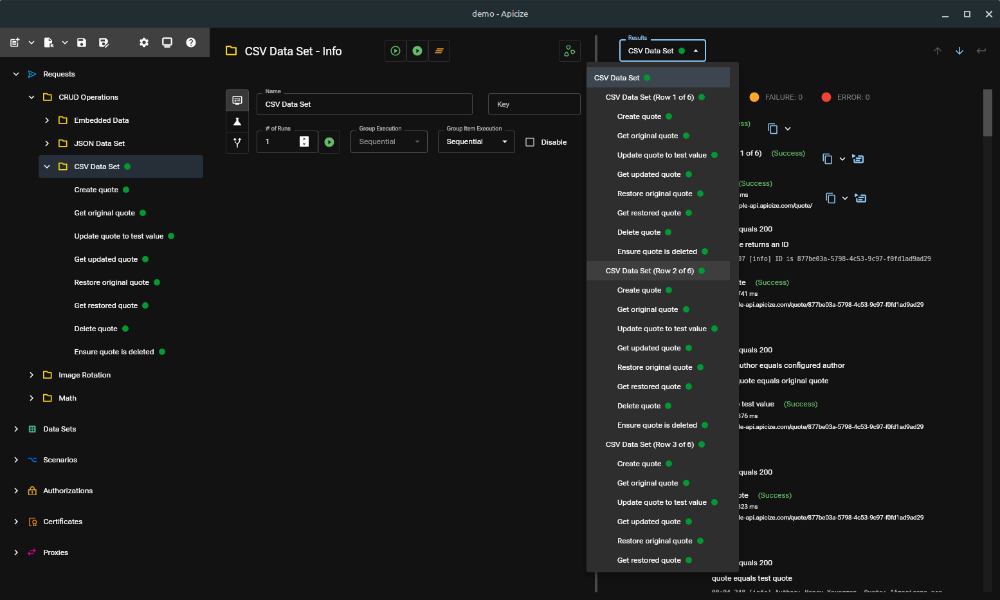
The groups labeled "JSON Data Set" and "CSV Data Set" both demonstrate testing a set of tests against multiple records defined in either a JSON or CSV file.
Viewing Results
To view how a specific request executed when running a group, select the request from the Results drop-down or click on the icon next to the summary. If you execute multiple runs, the drop-down list will include menu items for each run. Results are retained if you switch between different items in the Navigation pane.
Along the left in the lower response pane, you'll see a vertical tab bar. These let you view:
- Summary of execution
- Response headers
- Response body (either as text or Base64 if binary payload detected)
- Formatted response body (if Content-Type is recognized and handled)
- A CURL command you can distribute to demonstrate executing the request (**including** authorization headers)
- Details on the request and response (headers, body, data state, etc.)
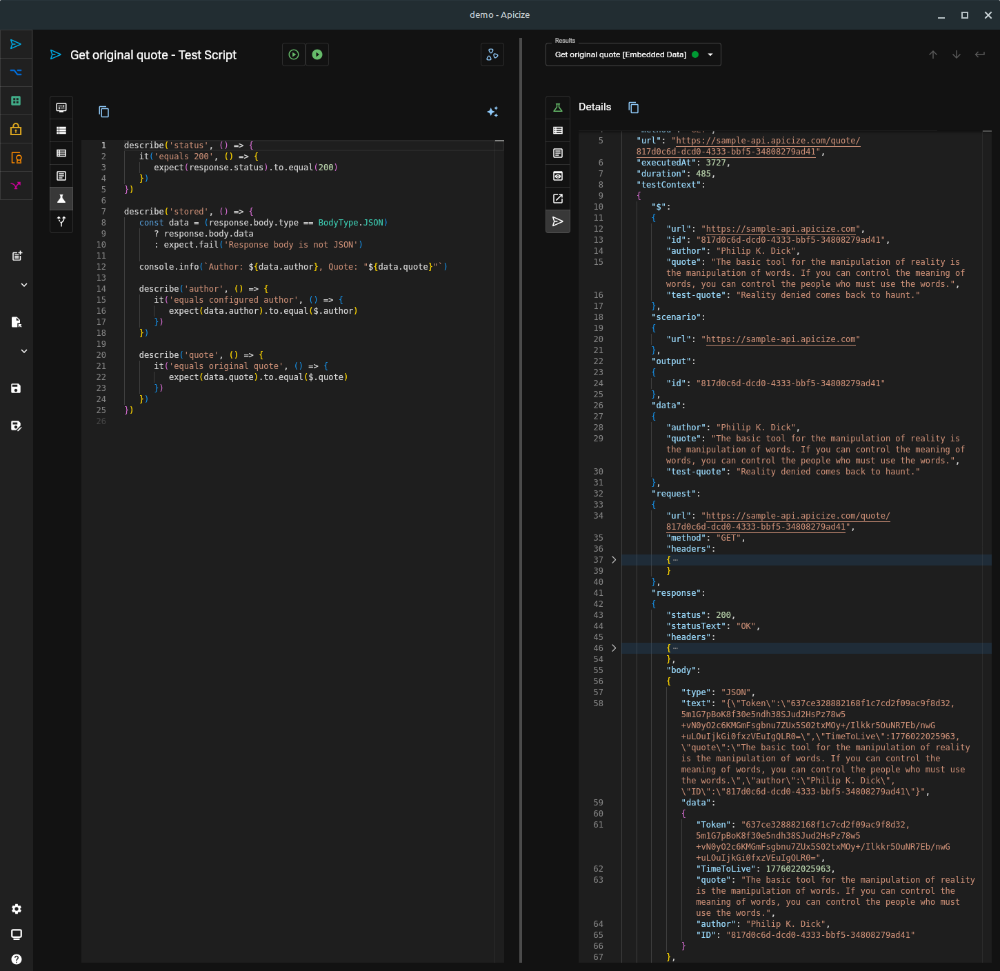
To the right, we see the response returned when creating a quote. That ID can be used for subsequent calls by leveraging Apicize's test capabilities.
Creating Tests
By default, Apicize creates a test for every request that checks to see if the response included an HTTP status of 200 (Ok). Apicize uses a BDD-style of formatting, powered by the Chai assertion library. This structure is used to organize and format the display of test results. Tests fail when an Error is thrown.
While checking for a 200 is useful, you can do more. You can inspect the response headers and body and throw an Error if something looks wrong.
Apicize tests run in an isolated V8 JavaScript environment. It's important to note that your tests are not running in a browser or even in NodeJS. There is no window, document or NodeJS libraries like fs. This design mitigates much of the risk to your local environment of running an arbitrary Apicize workbook and its tests.
What is available are the items in the test context.
Test Context
Apicize executes every test in a context.
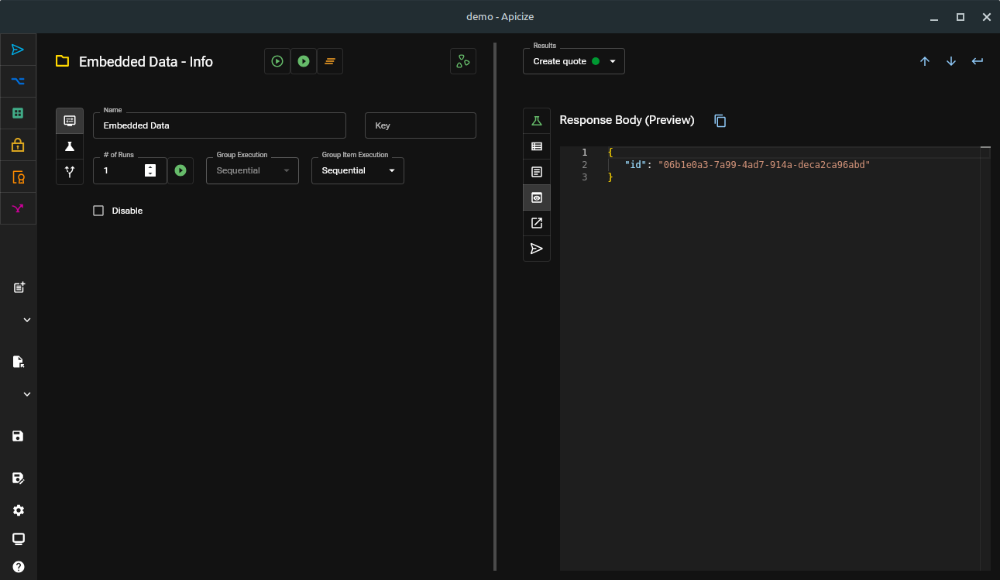
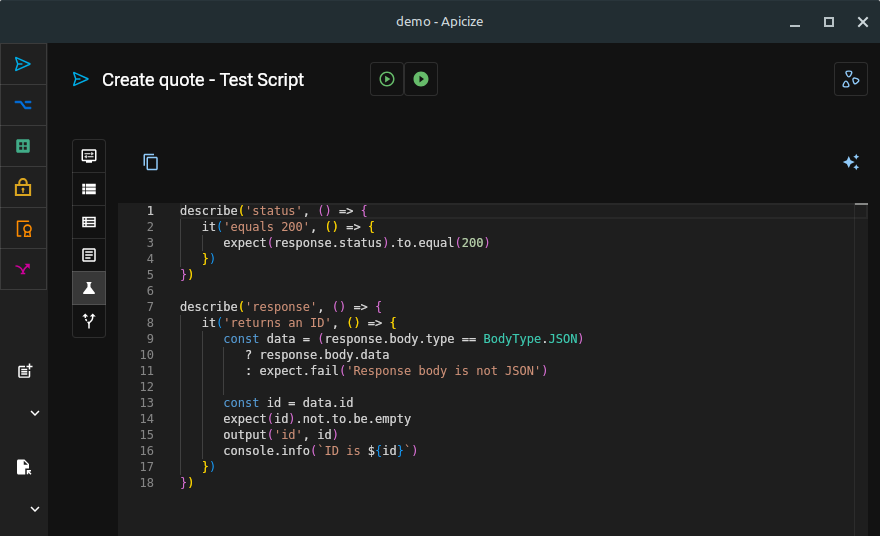
If you look at the test screenshot above, you'll see a line that calls **output** to set a variable called "id":
output('id', id) This adds the id value to the text context, and it will be available to subsequent requests and subgroups within the same group. This allows you to maintain a state between request calls in a group, provided you run those requests in sequence. In this example, we are parsing the body, retrieving the id value, and assigning that as a variable.
If you examine repsonse details after executing a request, you'll see the values available for testing in testContext:
- $: Consolidated shortcut object to values from output, data and scenario
- scenario: Values created from active Scenario
- output: Values created from previous calls to `output`
- data: Values from the current row in a Data Set
- request: Values associated with the current HTTP request
- response: Values associated with the current HTTP response
Data Sets
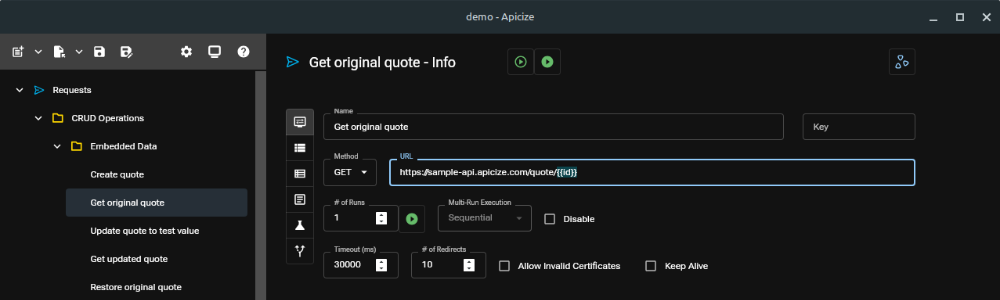
Data Sets are also useful when you want to test different sets of values using the same request or group of requests. Instead of having to clone those requests, you can create scenarios that can include a list of values to populate in variables. You can switch between them by selecting the Parameters tab in a request or group pane, and then selecting a Data Set.
When Apicize executes a request or group with an assigned Data Set, it will only iterate though the assigned Data Set for that executed request or group. It does not recursively pull in records from child requests or groups.
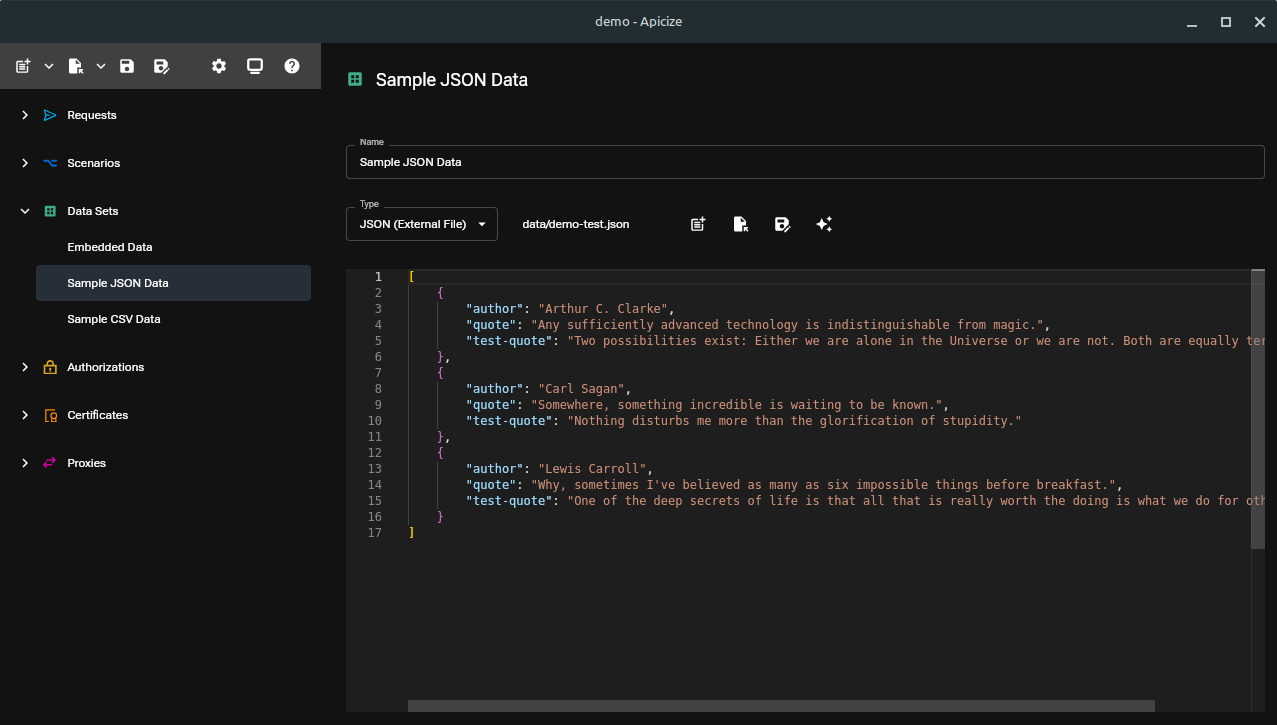
Data Sets can be defined and stored in three ways:
- Embedded JSON: the data is a JSON object or array stored with the workbook
- External JSON File: the data is a JSON object or array stored separately from the workbook
- External CSV File: the data is a CSV file stored separately from the workbook
Parameters
Requests and groups can have the following parameters assigned:
- Data Sets: as described above, one more records of data to test against
- Scenario: Variables to substitute for records (ex. "url" for site URL, you can use this for environmental values)
- Authorization: OAuth, Authorization or other header used to authorize a call
- Certificate: OAuth, Authorization or other header used to authorize a call
- Proxy: Socks5 or HTTP/S proxy

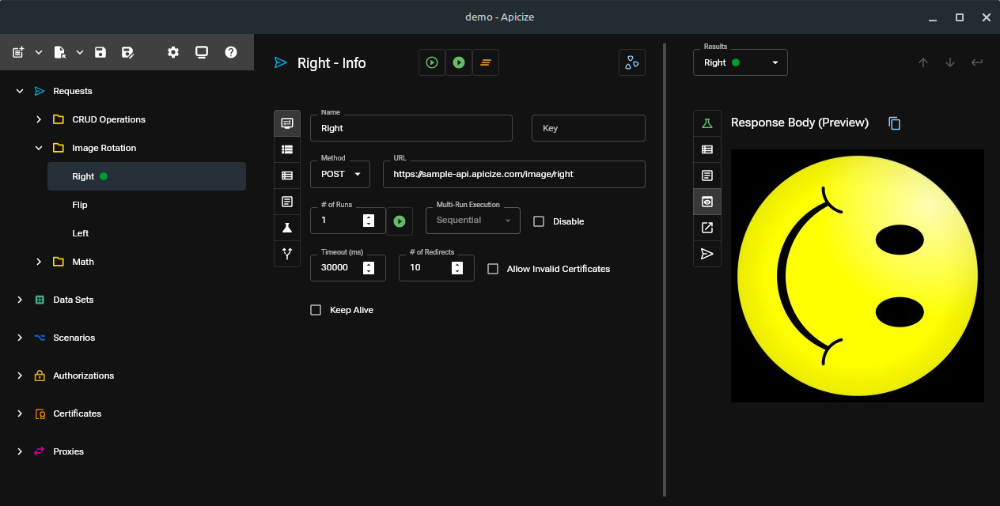
Testing with Binary / Image Data
You can pass binary data for Apicize tests by selecting the Body tab in the top request panel, and either opening a file (any type) or paste from the clipboard (images only). Supported image types will be previewed.
In the response pane, you can select the "raw" data or, if available, you can "preview" a formatted or rendered version of that data for handled content types. Binary data will be represented using Base64.